
Special access permissions allow you to set different availability dates and times for specific users for D2L Assignments and Quizzes. For example, you can add special access after an assignment’s end date has passed for users who have a legitimate excuse for missing a deadline or for users you want to submit additional material, such as an outline or a bibliography. You can also add special access to quizzes to extend the time a student has to take a quiz if, for example, they have an accommodation request on file.
Adding Special Access to an Assignment #
To add special access to an assignment, navigate to Assignments from the top navigation bar. Then, locate the assignment you would like to add special access to, click the down arrow next to the title, and click “Edit.”

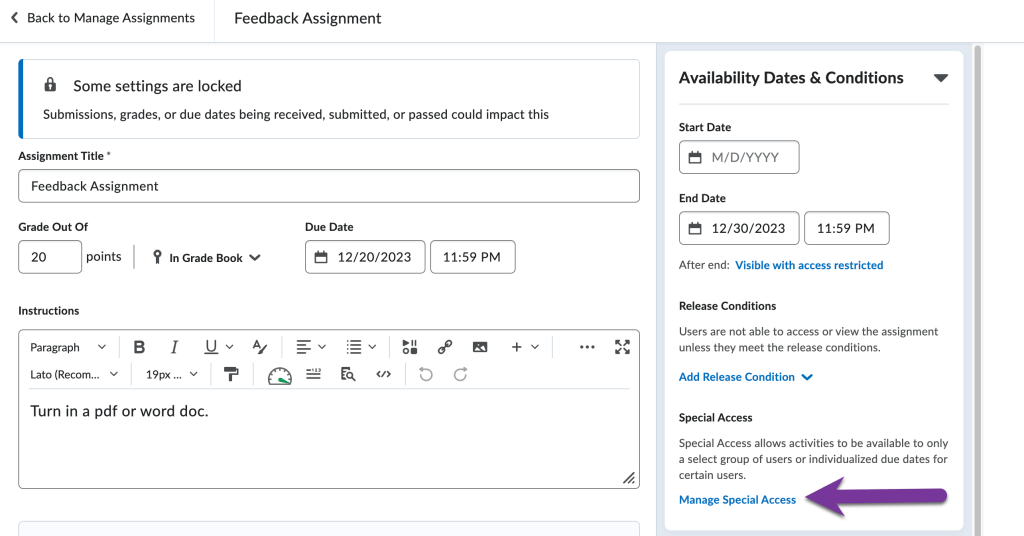
Click the “Availability Dates & Conditions” menu to open it. Then click on “Manage Special Access.”
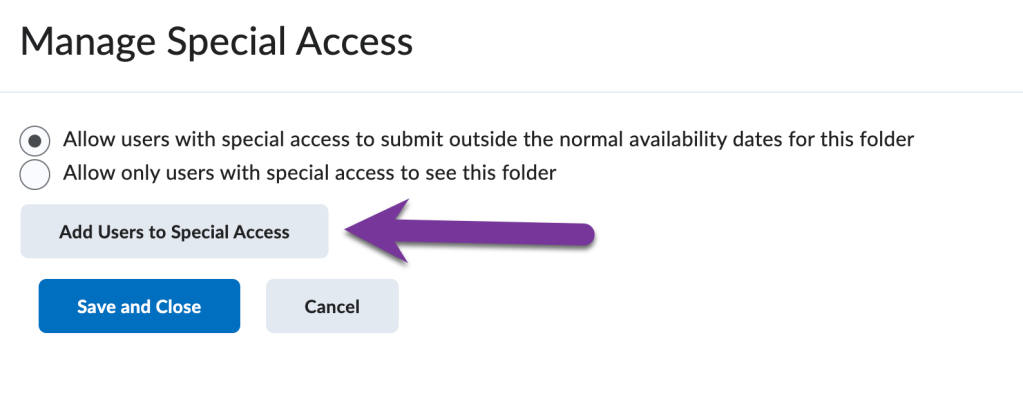
Then, you will be presented with two different options:
- Allow users with special access to submit outside the normal availability dates for this folder – This will open up the assignment to a specific student after others have already completed the assignment. This is the option most instructors choose.
- Allow only users with special access to see this folder – This will make it so only students with special access can submit things to this assignment. No other students other than the ones listed in this special access window will be able to view or submit items to this assignment folder.
When you’ve made your selection, click the “Add Users to Special Access” button.
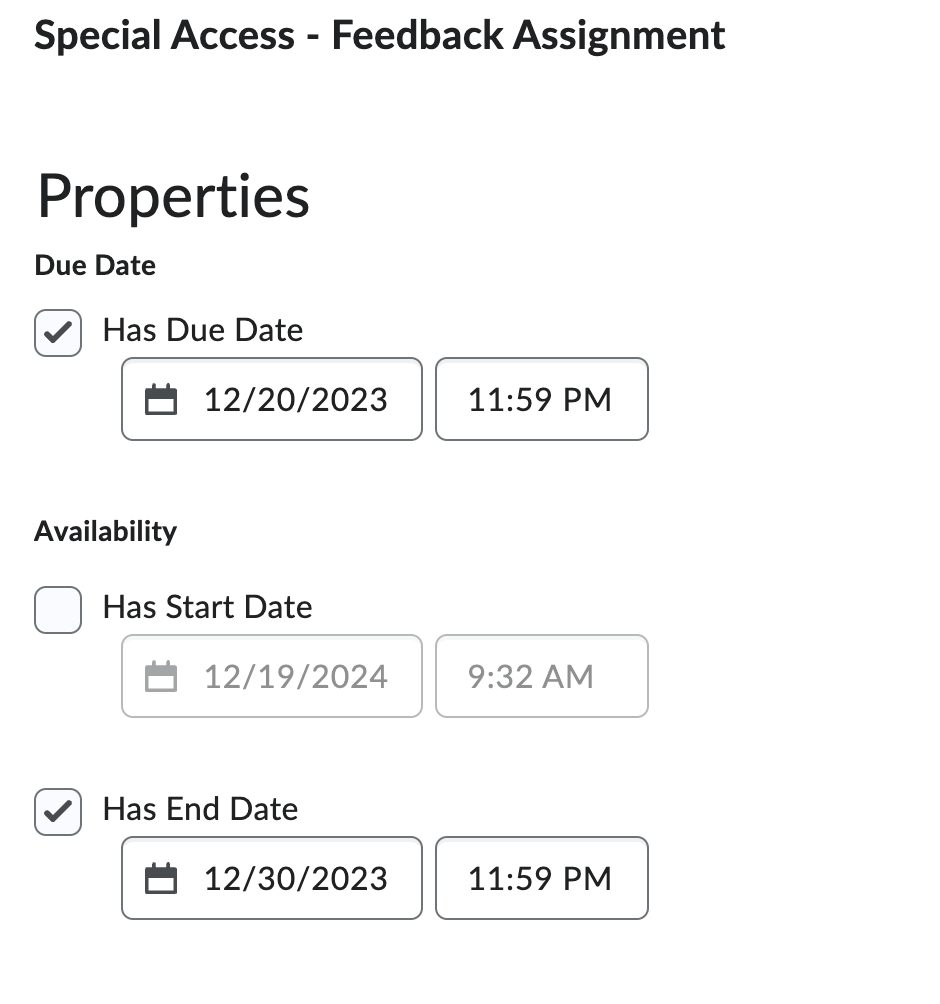
At the top of the screen, you’ll have the ability to change the start, end, and due dates of the assignment. You can also uncheck the box next to the start, end, or due date if you want to remove that date entirely for the student.
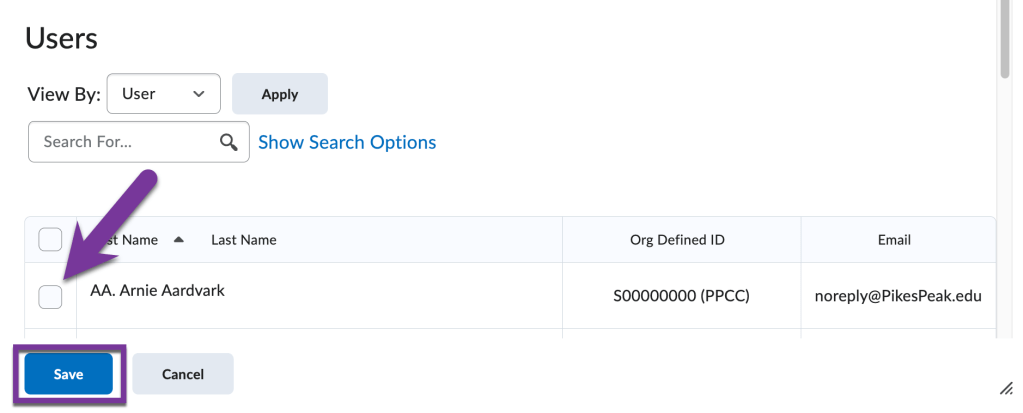
If you scroll down, you will see a list of all students in your course. Check the box next to the student’s name that you will want to apply the special access to. Then, click “Save.”
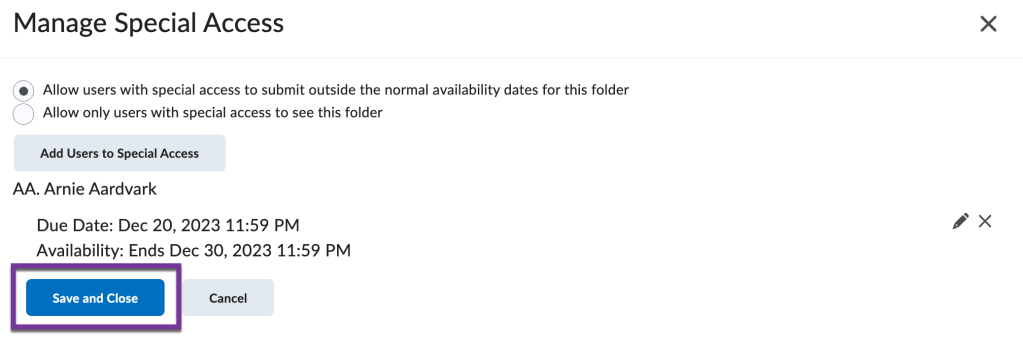
You should see the student’s name, and the custom dates and times you picked out for the student. If everything looks good, be sure to “Save and Close” the Manage Special Access window, then “Save and Close” the assignment.
Adding Special Access to a Quiz #
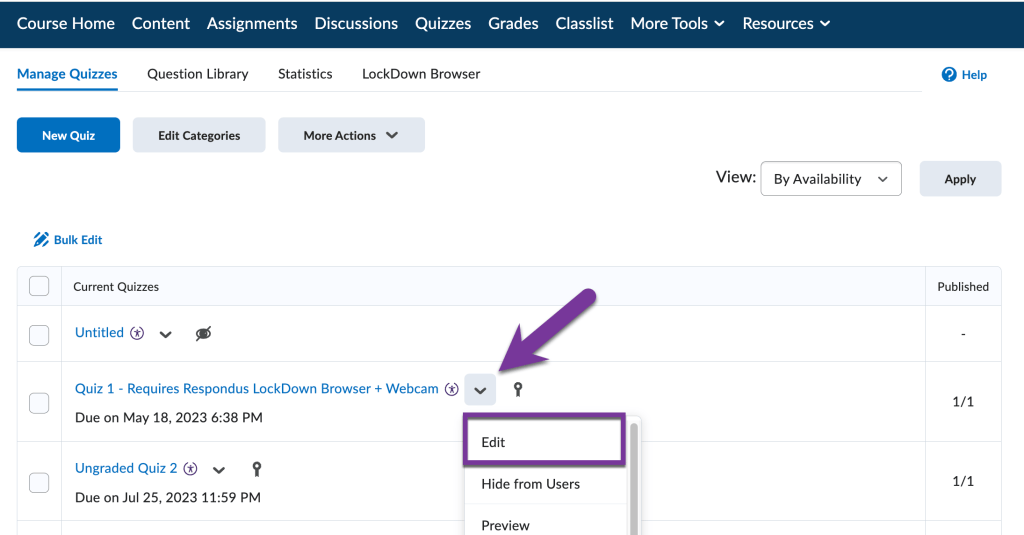
To add special access for a user to a quiz, navigate to the Quizzes area from the navigation bar in your course shell. Then, locate the quiz you would like to add special access to, click the down arrow next to the title, and click “Edit.”
Click the “Availability Dates & Conditions” menu to open it. Then click on “Manage Special Access.”

Then, you will be presented with two different options:
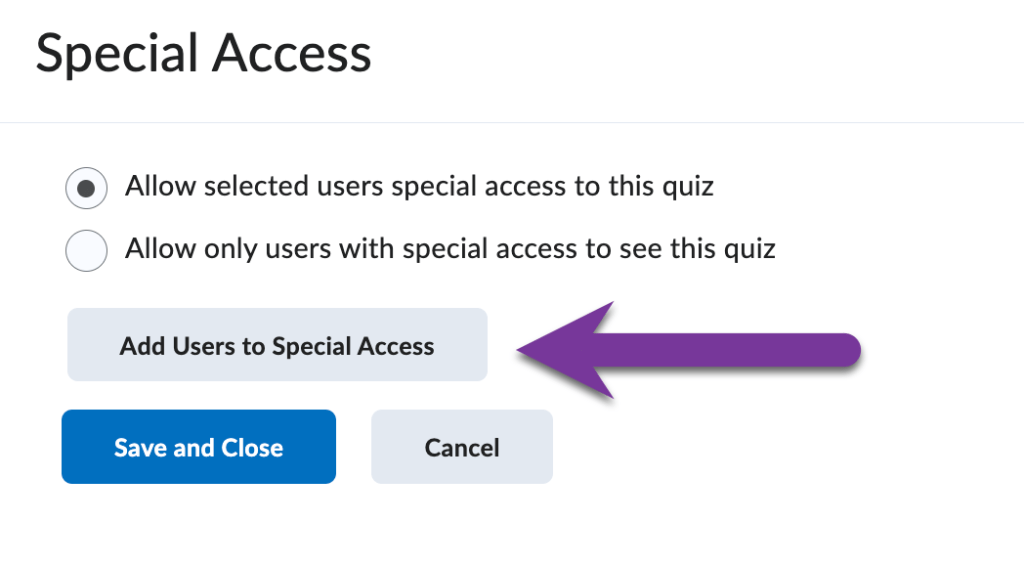
- Allow selected users special access to this quiz – This will open up the quiz to a specific student after others have already completed the quiz. This is the option most instructors choose.
- Allow only users with special access to see this quiz – This will make it so only students with special access can take this quiz. No other students other than the ones listed in this special access window will be able to view or complete this quiz.
When you’ve made your selection, click the “Add Users to Special Access” button.
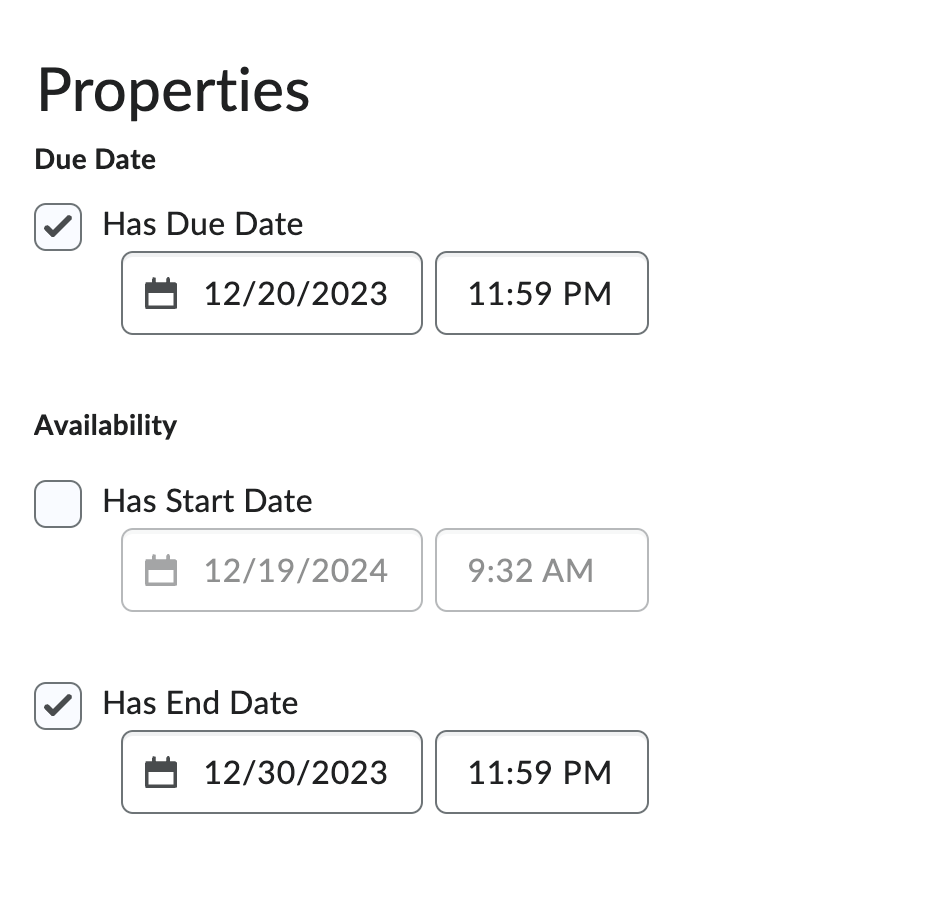
Similar to special access for assignments, the first features you can adjust for students are the start, end, and due dates for the quiz. You can also uncheck the box next to the start, end, or due date if you want to remove that date entirely for the student.
Two properties that can be adjusted that are unique to quizzes are Timing and Attempts.
In the Timing section, you can override the time limit you may have placed on a quiz for the student, or you can change what happens after the student has passed the time limit (submit quiz automatically, flag quiz as exceeding time limit, or allow the time limit to not be enforced).
Additionally, if you’ve required the Respondus Lockdown Browser for this quiz, you can choose to disable it for a student in this Timing section.
In the Attempts section, you can override the attempts allowed for an exam and pick a new number of attempts a student has to take an exam.
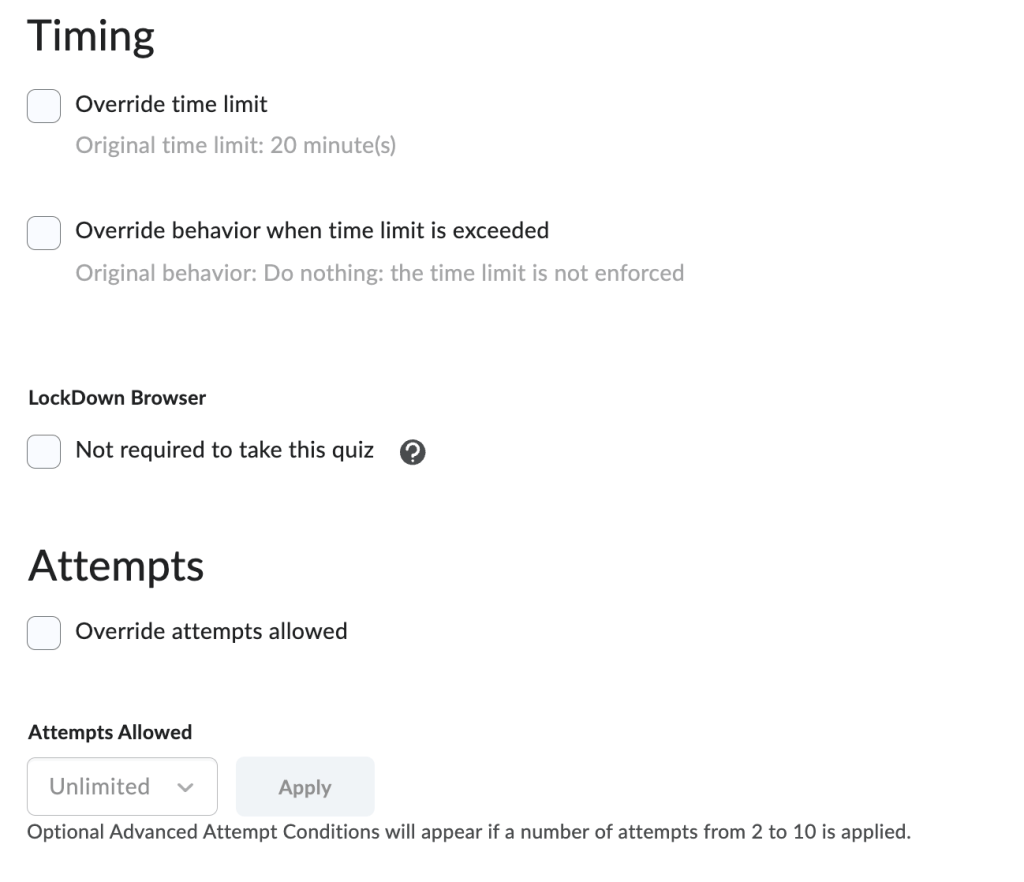
If you scroll further down, you’ll see a list of all students currently enrolled in your course. Check the box next to the student’s name you want the above special access settings to, then click “Save”
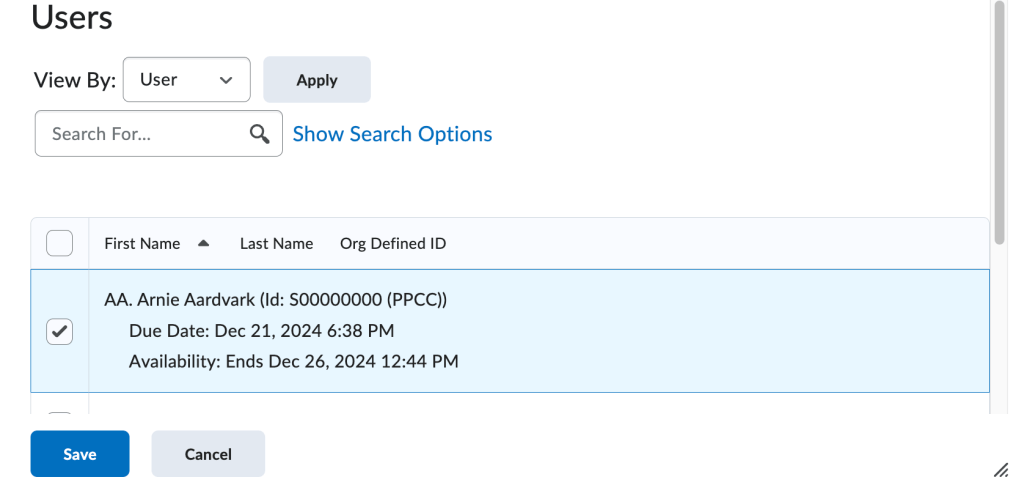
You should see the students listed and the settings that are customized for each student. If everything looks correct, click “Save and Close” to close the Manage Special Access window, then “Save and Close” the quiz.
Note: if a student needs extended time on all quizzes in your course, see the following article to find out how to do this in bulk: Add Quiz Special Access Accommodations and Time Limits.
Adding Special Access to a Discussion #
Currently, there is not an option to give users special access to a discussion after the “End Date” has passed. In these instances, we recommend editing the Discussion Topic and removing the end date, which will open the discussion topic for all students again. Be sure to “Save and Close” the Discussion topic when finished.
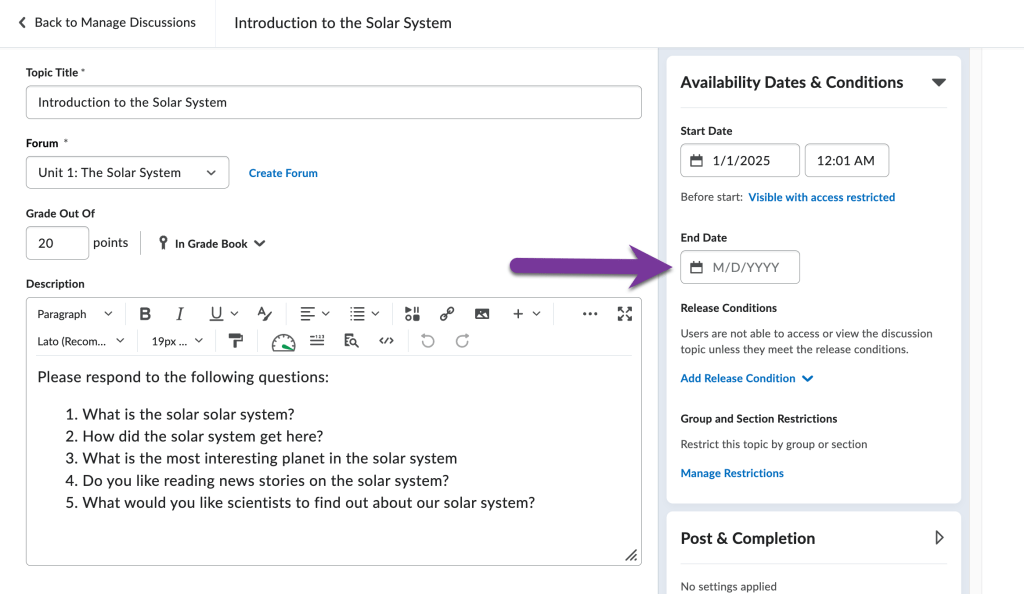
Alternatively, you can create a D2L group that only contains the student who needs special access. Then, create a new discussion topic and give access to only the group that contains that student. In this case, the student will not be able to view or respond to any of their peer’s responses to the discussion topic.
To do this, create a new Discussion Topic and copy and paste the instructions from the original topic. Then, click on Availablity Dates & Conditions menu to open it and click “Manage Restrictions.”
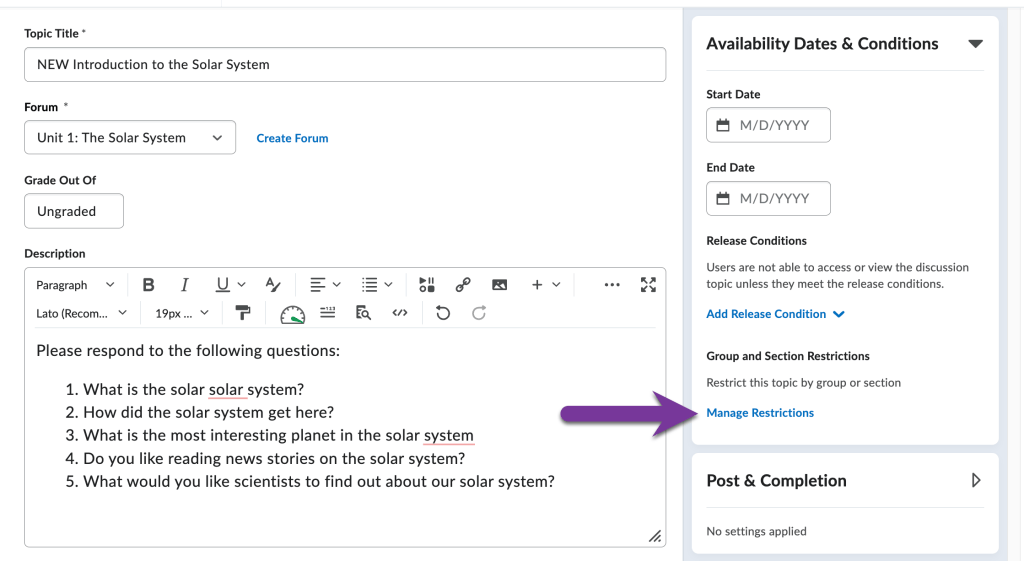
Make sure the settings are set to “Restrict Topic.” Then, select the group that contains the single student. If you missed how to create a D2L group, please view the following support article: Create groups.

Then, click “Add.” Make any changes to the Start and End dates for the discussion and any other setting you would like to add. Then, “Save and Close” the discussion topic. Only the student included in the D2L group will be able to see and respond to this discussion topic.
Please contact elearning@pikespeak.edu for more information.


You must be logged in to post a comment.