
If you need to start, join, or schedule a WebEx Meeting, please view our Getting Started with Webex article first.
Two features commonly used in WebEx are sharing the screen and recording the session. We’ll talk about each of them here.
Sharing the Screen #
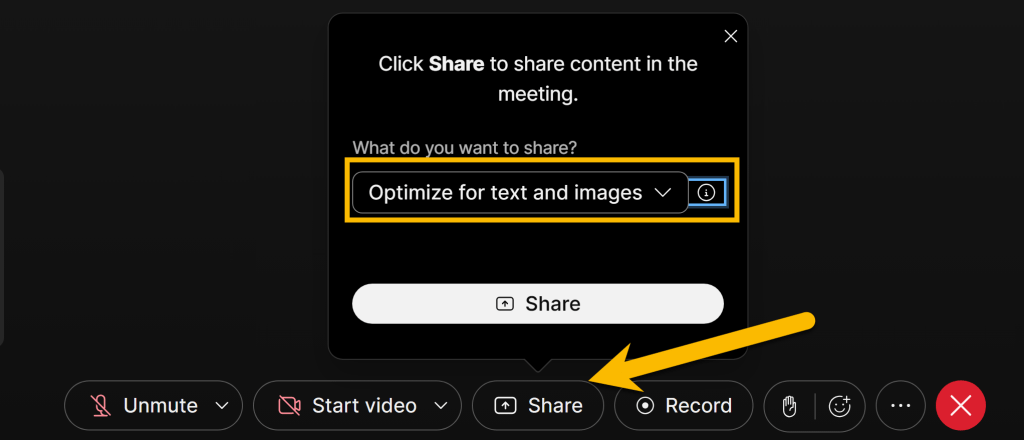
Often, we have an image, PowerPoint or other item on our computer we want to share with others in our meeting. To do this, click on the “Share” button at the bottom of the WebEx window. WebEx will give you a dropdown menu to select “Optimize for Text and Images” or “Optimize for Video and Motion. Select the first option if you plan on showing a static document or image. Select the second option if you plan on showing any videos or animations. Click on the white Share button when you are ready to continue.
This will open a new screen which will allow you to select the item you would like to Share. We recommend choosing to share your Entire Screen, and select the “Also share system audio” option. This will make it so you can jump between multiple windows and applications without worrying if others in the meeting can no longer see what you are showing them. The “Share system audio” option will also allow you to play videos and audio and be reassured that meeting participants can hear everything your computer plays.
A couple of notes here. First, be sure to close any sensitive information before sharing your screen. If you have to share your screen and keep things open you don’t want others to see, choose the Window or Tab options. Click “Share” when you’ve selected the screen you’d like to share.

This will allow others to see your screen. If at any time you want to stop sharing, you can click Stop sharing at the bottom of the screen or go back to the WebEx window and click on Share.

Recording Video #
Students can’t always attend meetings in WebEx. For this reason, we have the option for meetings to be recorded.
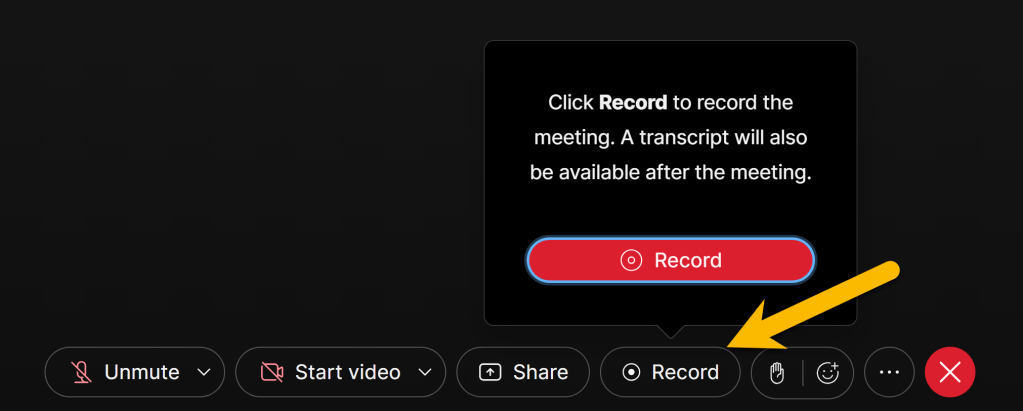
To record a meeting, click on the Record button at the bottom of the WebEx window and then click the red Record button. This will start the recording. Once the recording has started, you’ll have two options, Pause and Stop. If you pause, it’ll allow you to continue with the same file. If you push Stop, it will end that file and begin processing in the background.
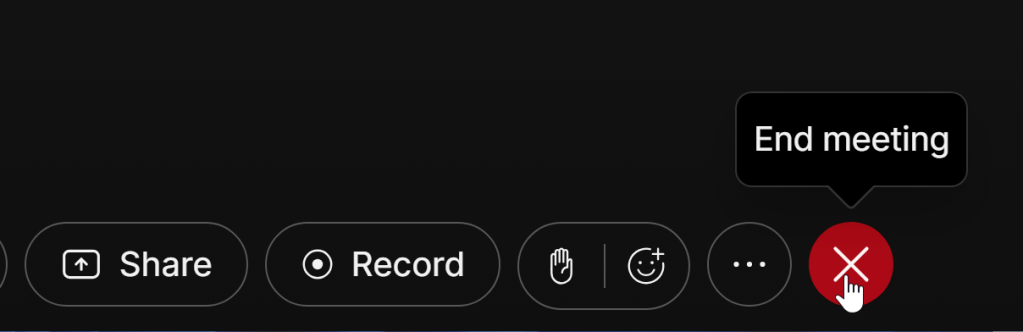
Once you are done with the recording click on “Stop”. To end the meeting, click the ‘x’ icon at the bottom of the WebEx screen and Leave Meeting. If you use the Personal Room, this will end the meeting for all participants.
Which will take you back to the CCCS WebEx User Hub where you started the meeting. However, there’s one button in the upper left you may have missed. It’s the Recordings tab:

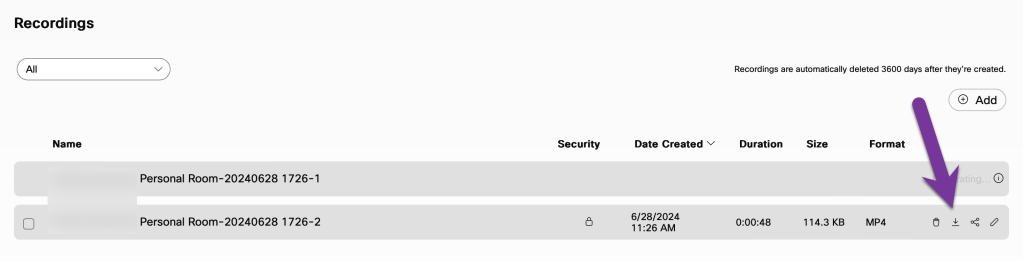
Click on that and you’ll see a list of your recordings. Note that there is no limit on how much you can record. However, there is a delay from the end of the meeting to the video being available. Once the video is ready (you should receive an email when it’s ready) click the download button to download the .mp4 file.
Once the file is downloaded, you can distribute it to your students by uploading to Content in D2L. The file will be too large to email to students.


You must be logged in to post a comment.