
WebEx is a system approved video conferencing software. It allows for groups to meet and talk in real time, share screens and see each other. To use this tool, go to WebEx (https://cccs-meetings.webex.com) and click on the Sign In button in the upper right:

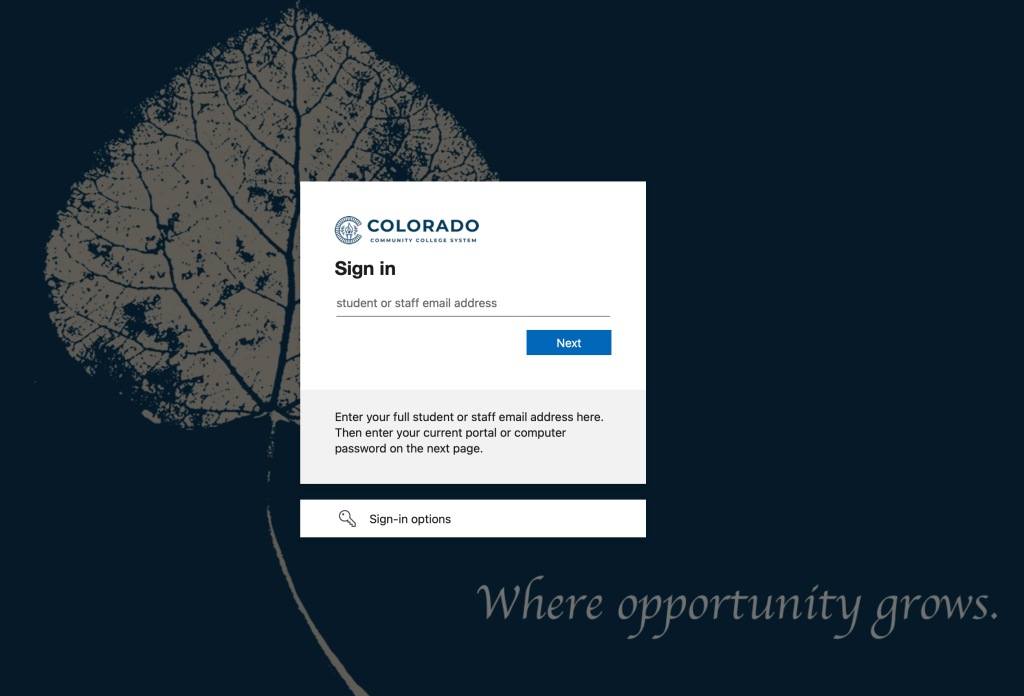
Then, put in your PPSC email address into the page below and click “Next”

This next page will take you to the CCCS single sign-On which should look familiar to you. Enter in your PPSC email address and password.
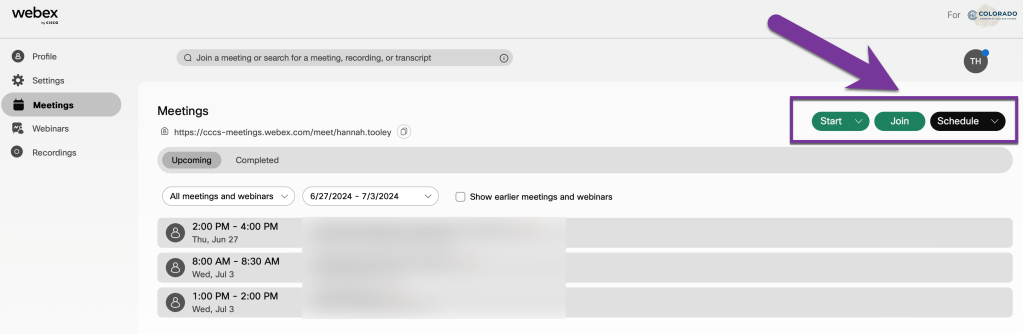
Now, you should see the WebEx User Hub. From the top right, you can Start a meeting in your own personal WebEx room, you can Join a WebEx meeting you’ve been invited to, or you can schedule a meeting for a later time.
Start a Meeting #
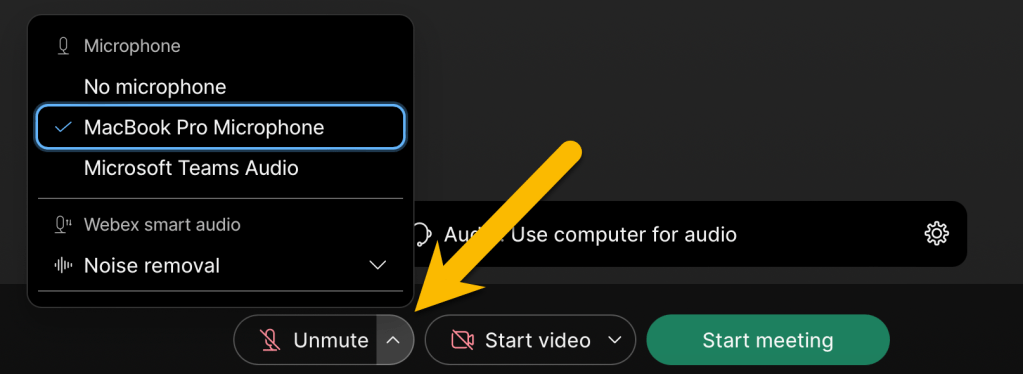
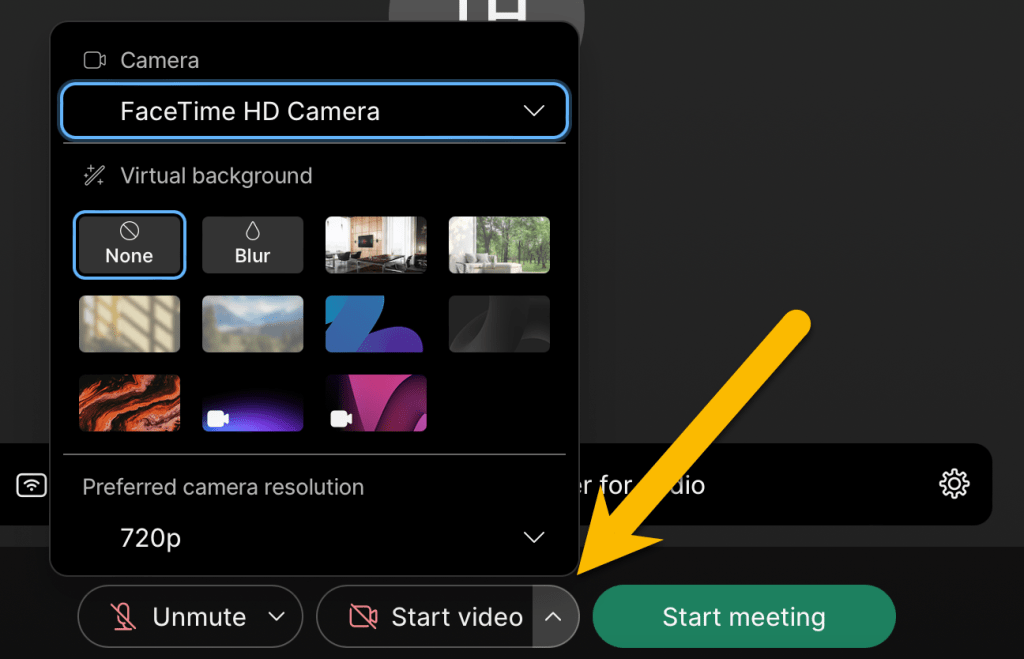
If you want to jump immediately into a meeting with a student or a colleague, click on the Start button to Start a WebEx meeting. This will start a meeting in your own personal meeting room. The first screen will let you check your microphone and video settings to make sure they are working. Toggle the Mute/Unmute button and the Start Video/Stop Video to turn your microphone on and off. If you want to change the microphone source, click on the down arrow next to the microphone icon and select a different microphone. You can also change a different video source, or add a virtual background by clicking on the down arrow next to the video icon. Click on “Start Meeting” when you’re ready to jump into the WebEx room.
This will start the meeting. From there, the meeting will start and the screen will look like this:
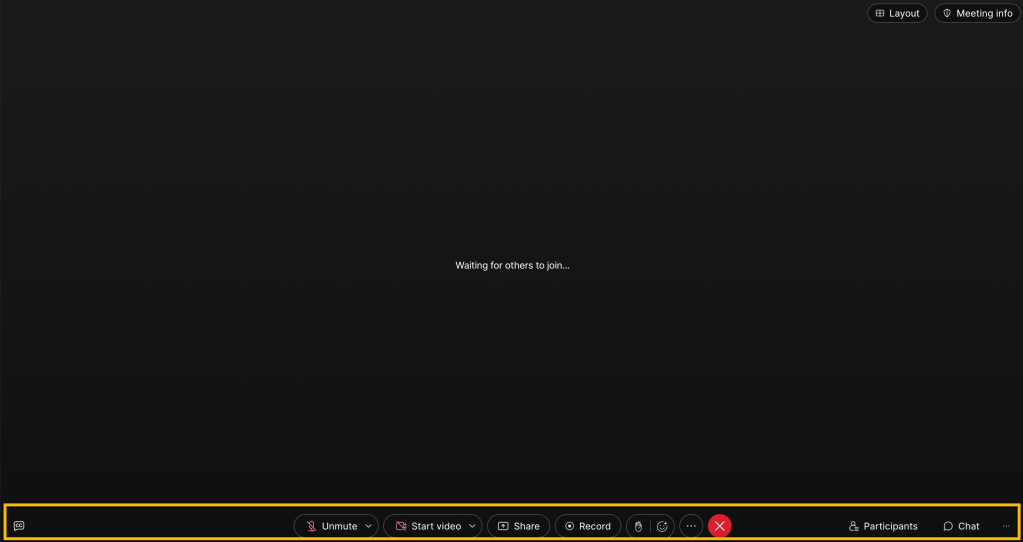
From here, you are on the meeting and can control what you want in the meeting. The icons at the bottom, from left to right are:
- CC Closed Captioning – Start captions for the meeting
- Unmute/Mute (for your microphone in case of background noise)
- Start Video/StopVideo (on/off)
- Share (if you want to share a screen or application)
- Record (to record the meeting. If you post recording to the class, it should be captioned.)
- Raise Hand (to let others in the meeting know that you’d like to speak next)
- Reaction (share an emoji reaction to what someone is saying during your meeting)
- Three dot icon (additional WebEx settings)
- Red X icon (click to end the meeting)
- Participants (you can view all the participants in the meeting, mute/unmute participants, or invite someone to your meeting from here)
- Chat (text communication between users in the meeting)
I encourage you to do a practice meeting with a couple of users well in advance of the meeting. The practice will also help you feel more comfortable presenting content. Also, view our article on Screensharing and Recording WebEx Meetings for more information on those features.
Join a Meeting #
If you’ve been invited to a WebEx meeting, you can click the Join button from the WebEx User Hub and search for the meeting you’ve been invited to.
You can also join a WebEx meeting directly from an email or calendar invite as well.
Schedule a Meeting #
If you’d like to schedule a meeting for a later date (or create a reoccurring meeting for a class), click on the Schedule button from the WebEx User Hub. This will bring up the schedule meeting form.

Make sure to enter in a Meeting Topic, pick the Date and Time you’d like to run the meeting, and check if this meeting should be a “Recurrence” or not. Click on Security, Audio Connection Options, and Advanced Options to see more settings. Click “Schedule” at the bottom of the screen to schedule the meeting. This will give you a meeting invitation that you can copy into an email or a calendar event.
See the following WebEx support article for more information on Schedule settings.


You must be logged in to post a comment.