
Gradebooks can often grow very large and become tough to manage when they do. This is why we recommend putting grade items into categories.
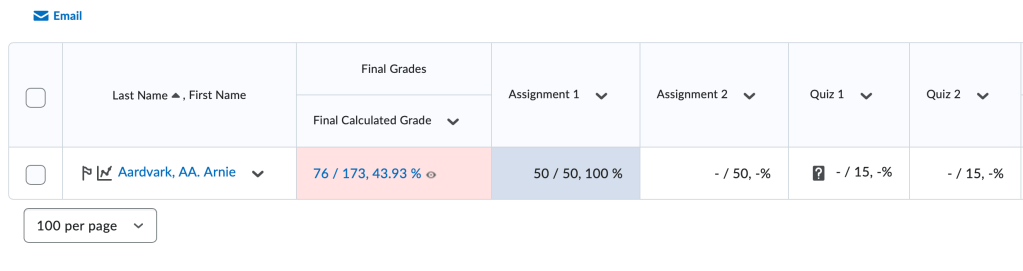
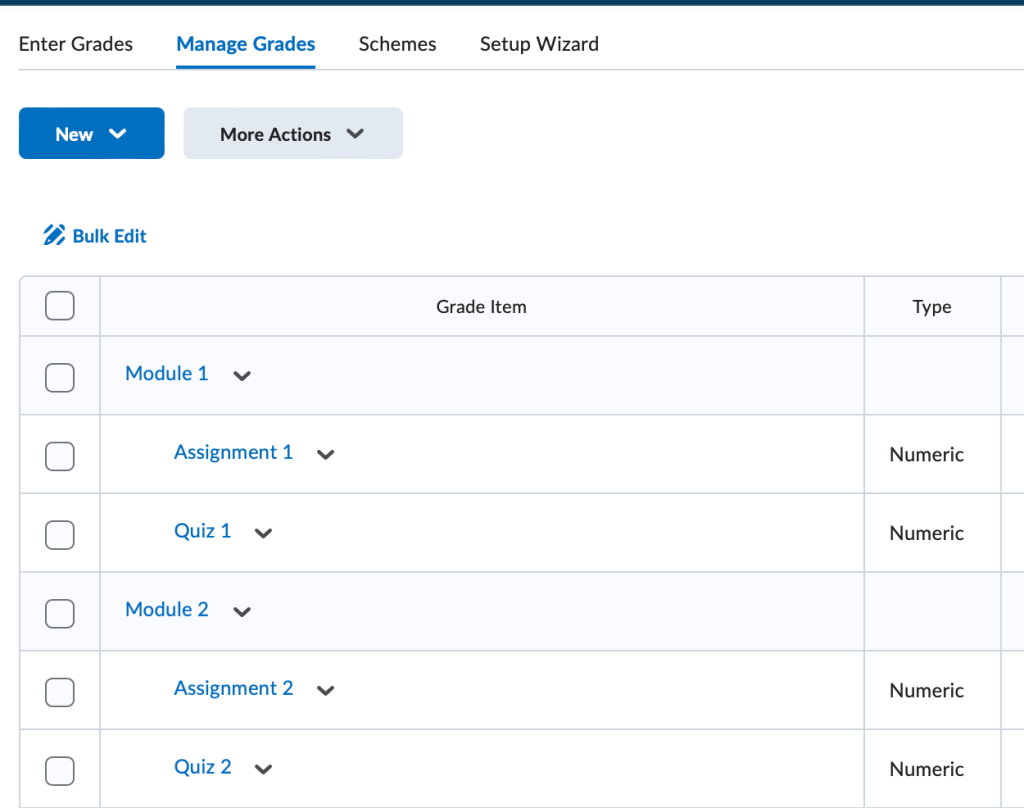
Some instructors like to categorize their gradebook by item type (e.g. Quizzes, Homework, Exams, etc.) while others like to categorize by the week or module they cover (e.g. Module A, Chapter 5, etc.) So, let’s do our example here based on Modules. Let’s say we have this gradebook:
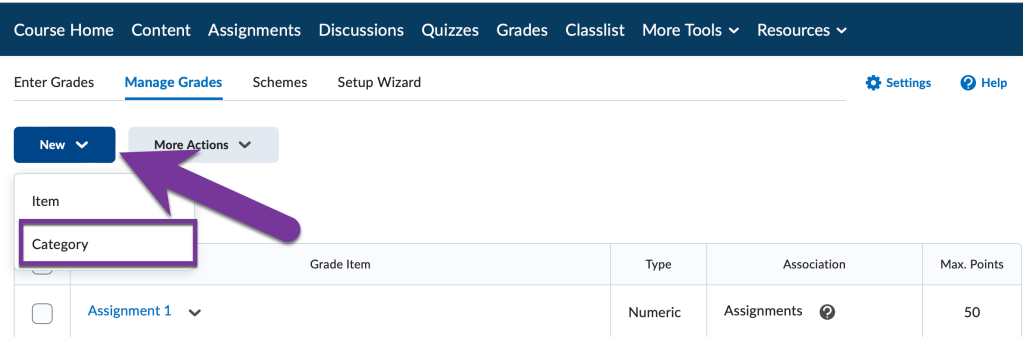
We need to put the Module 1 stuff together in a Category and the Module 2 stuff in another category. Let’s go to the Manage Grades tab, click on New, and select Category.
From here, we need to fill out the “New Category” form:

- Name is what you’d like to name your category
- Short Name is if you want a shorter name to appear in the gradebook vs. the regular name.
- Can Exceed needs to be checked if students can score over 100% for this category. Otherwise, it will cap the score at 100%.
- Exclude from Final Grade Calculation will make a grade category excluded from the final grade calculation.
- Distribution allows each item in the category to be worth the same number of points if you choose. In turn, this allows you to drop the lowest and/or highest score(s) from a category.
After entering in all the information you want, click on “Save and Close” to exit, or click “Save and New” which saves the Current Category and gives a blank form to fill out for the Next Category.
Put Grade Items into Categories Individually #
When finished creating categories, it’s time to sort the grade items into the categories. There are two ways to do this– individually or by bulk.
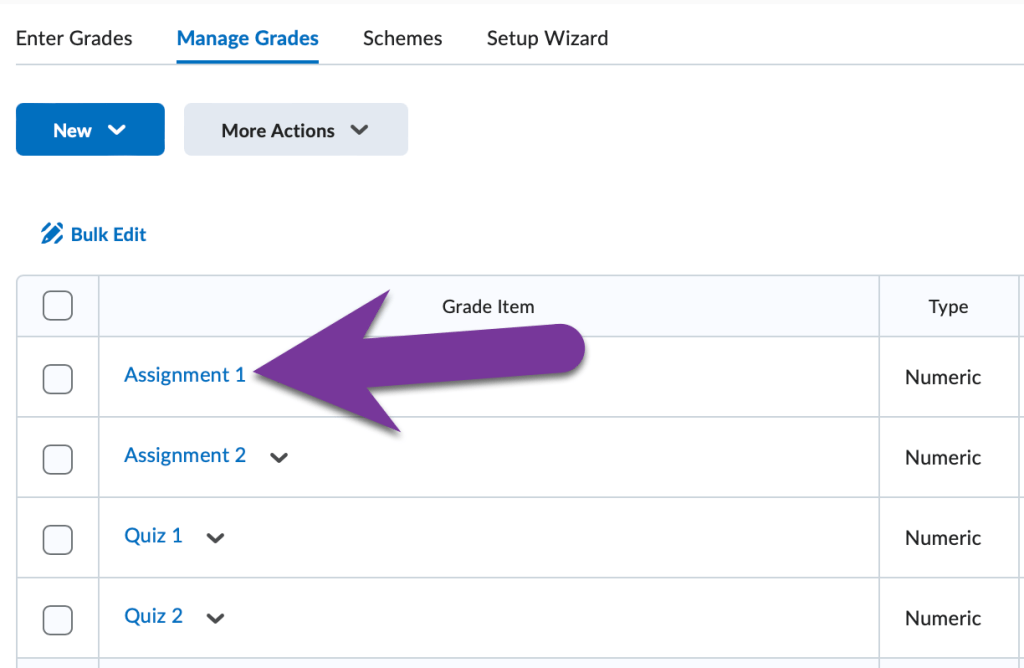
You can do it for each item individually if you only have a few items to sort. From the Manage Grades Tab, click on the title of a Grade Item to edit it.
From here, you can select the correct category from the dropdown under Category.

Then, click “Save and Close” and the item is put in the selected Category.
Bulk Edit Grade Items #
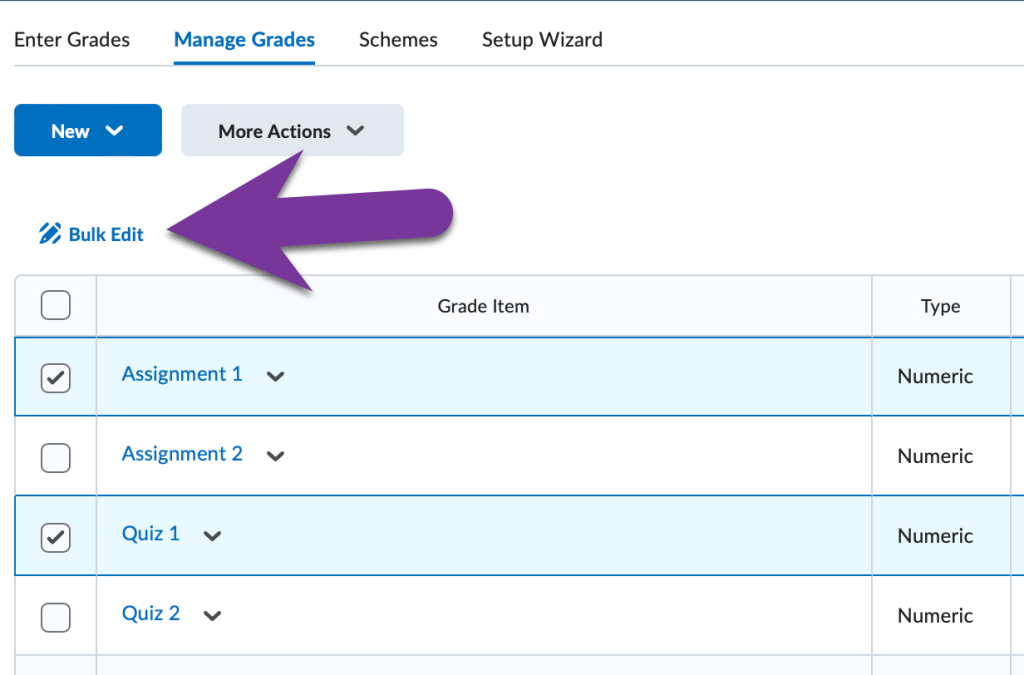
However, if you have a bunch of Grade Items, this could take a long time. If you want to sort multiple grade items at a time, from the Manage Grades Tab, check the boxes of all the grade items you would like to move into a category, then click “Bulk Edit”.
From here we get a screen were all items (and categories) can be edited in one screen. Simply, select the correct category for each item:

Be sure to click Save when you are done. Now your grade items are in categories. Here’s a look at the Manage Grades view:
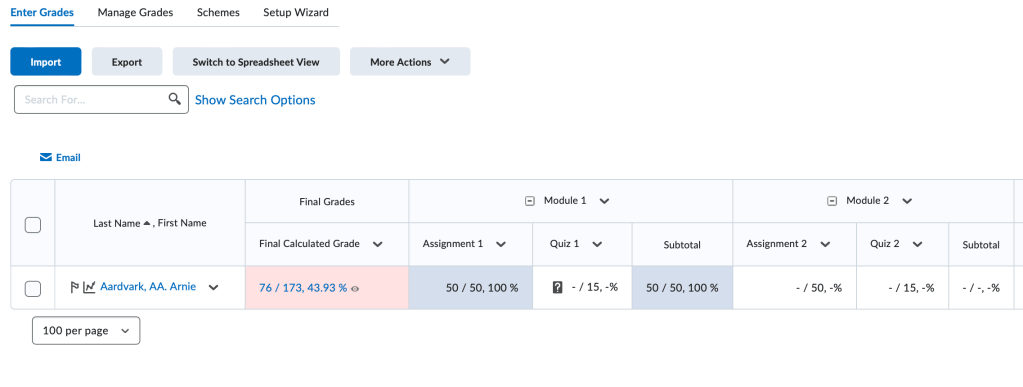
And what it looks like in Enter Grades view:


You must be logged in to post a comment.