
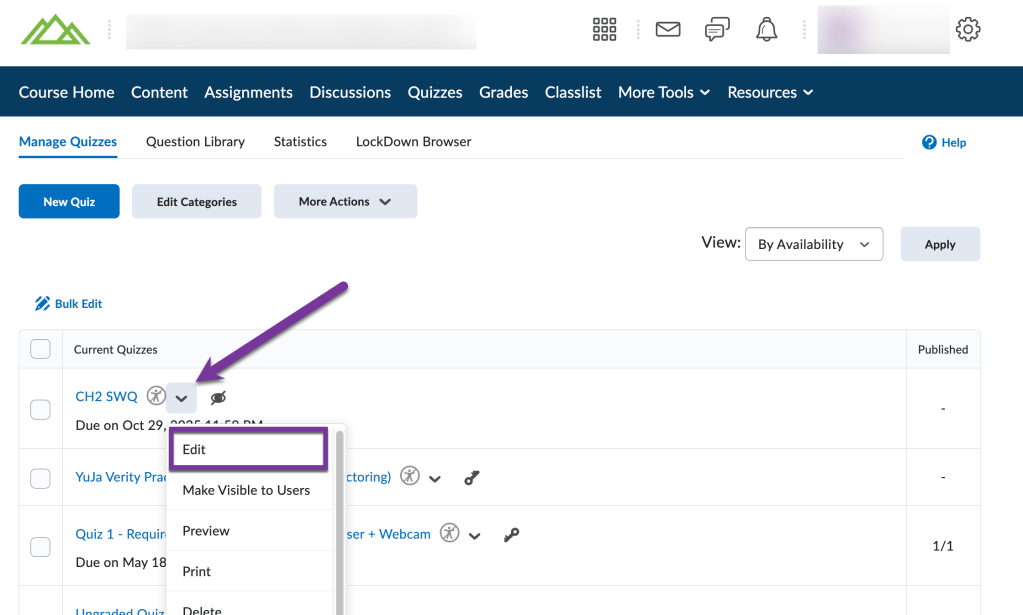
To add a time limit to a quiz, you’ll first either need to create a quiz, or edit a quiz by clicking the down arrow next to the title of the quiz and selecting “Edit.”
Then, open the “Timing & Display” menu and check the box for “Set time limit.”
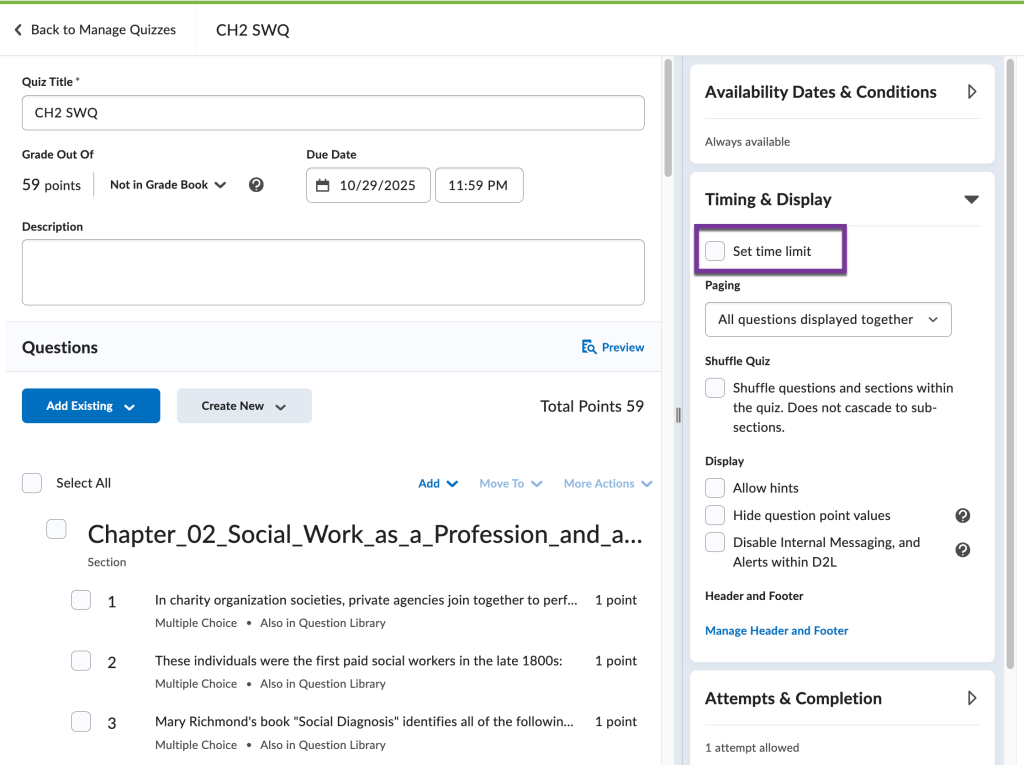
After checking the box for “Set time limit,” you will see more settings appear. Enter in the number of minutes students will have to complete the quiz (the default is 120 minutes). The default will also be set to “Asynchronous” and to “Auto submit the quiz when time is up.” Click on the “Timer Settings” link to see all the options available.

A window will pop up with a few more options:

Quiz Start Settings #
Asynchronous: Means that the student can open the quiz at any time (between the start/end dates you may set), and the countdown timer will start when the student launches the quiz.
Synchronous: Means that the test can only be taken when the start date and time begin. Students will only have from the start date to the end of the timer to take the quiz. This setting is used most often for in-person exams.
When The Time Limit Expires Settings #
Automatically submit the quiz attempt: When the timer runs out, the work the student had completed on the quiz is automatically submitted.
Flag as “exceeded time limit” and allow the learner to continue working: The student can work past the time limit you’ve given, but you will see a notice on the student’s attempt that they went over the time limit.
Do nothing: the time limit is not enforced:The student can work past the time limit given, and you will see no flag when they’ve exceeded the time limit.
When you are finished selecting the options you want, click “Ok” on the window, then “Save and Close” your quiz.
Note: If students have already started taking their quiz, a quiz timer can not be enforced after the fact. Make sure you have the timer in place before students begin taking the quiz.


You must be logged in to post a comment.