
If you have been given department chair access to Simple Syllabus, you can view all of the course syllabi for your department and make a unique syllabus template specific to your department.
Viewing Instructors’ Simple Syllabi #
To view all Simple Syllabi for your department, you will need to log directly into Simple Syllabus (cccs.simplesyllabus.com) using your S# and password. Click on the person icon in the top-right corner and click “Login”.
Note: You will not be able to view your instructor’s syllabus through D2L using your department chair account unless your instructor has made it public. Logging directly into Simple Syllabus will be the best way to review all syllabi for your instructors.

When you log in, you will be presented with the Simple Syllabus Dashboard. Your Dashboard will be divided into two parts — those that have not started or are currently working on their syllabus (1. in the image below) and those that have completed their syllabus (2. in the image below).
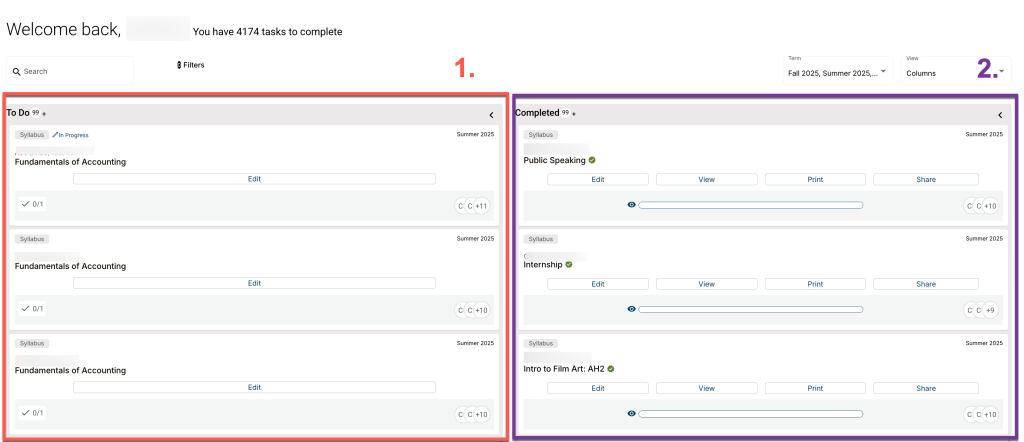
You can narrow down your search for a specific syllabus by using the search field, filters, and term selection options.

**New as of October, 2025: Department Chairs can also Impersonate Arnie Aardvark to view an instructor’s Simple Syllabi in D2L regardless if the instructor has set their syllabus permissions to Private, Campus Community, or Public.
Editing Your Department’s Syllabus Template #
As a Department Chair, you will be able to edit your department’s Simple Syllabus Template, which means that you can create or reorder syllabus elements that will be applied to all of your instructors’ Simple Syllabi.
Note: If you do not edit your department’s syllabus template, it will default to the institutionally-created syllabi template. You only need to edit your department’s syllabus template if you want to add or reorder elements for all of your instructors’ syllabi.
Certain template elements that come from the institutional-level Simple Syllabus template will be locked for editing or removal. Required elements from the institutional-level Simple Syllabus cannot be made optional.
To access your department’s Simple Syllabus Template, click on the three-block icon on the left sidebar navigation from the Simple Syllabus Dashboard.

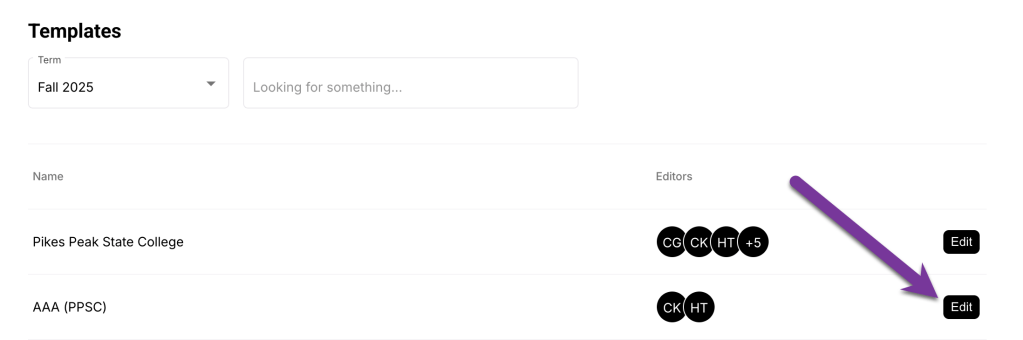
You will see all the department(s) syllabi templates that you will be able to edit. Note: The default term template will be the current semester. Be extra sure that you are working in the correct semester by looking for the term in the top left of your screen. To select an upcoming semester, click on the Term field, click on “Future.” Then, click on the correct semester.

Click “Edit” to edit the template.
Double-check you are editing the template for the correct term in the template title (top left corner).

Adding a Component to the Syllabus Template #
To add a component to your department’s Simple Syllabus template, click on the “Add” button in the left navigation bar.

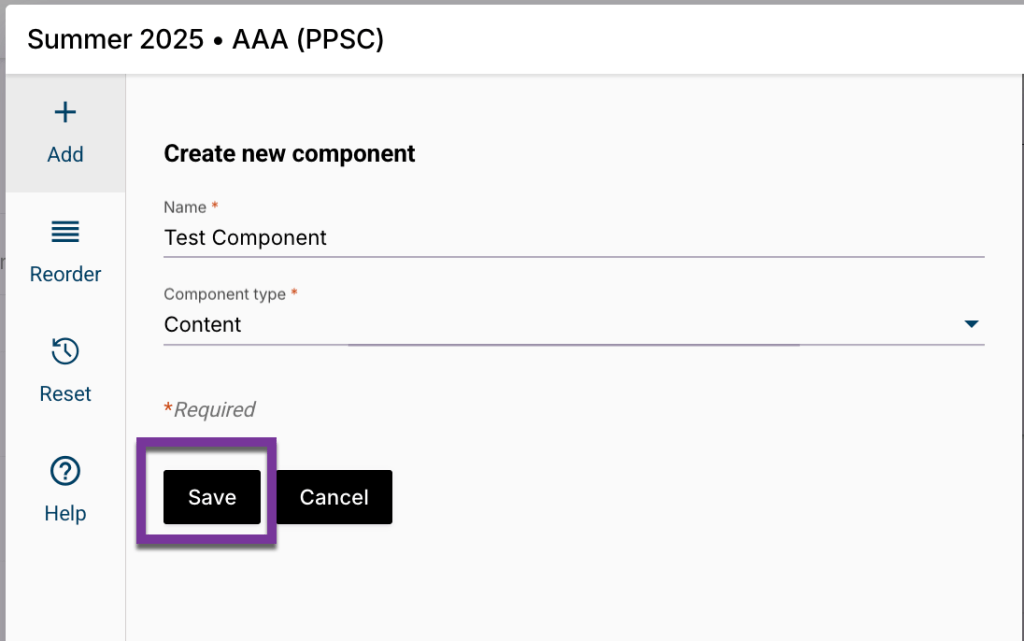
From here, you will be able to name the component and choose its type. There are 6 different types of components to choose from.
- Content – This is the most common type of component. Instructors will be given a single box to enter in information.
- Materials – This component is used to add course materials, which is already provided by the institutional template (there aren’t any other uses for this component).
- Objectives – This component can be used to provide a list of information. Content components can also be used to provide listed content.
- Instructor – This component allows for users to enter in their names and emails. This is used for the Instructor Information component provided by the institutional template.
- Schedule – This component can be used to add a table to your syllabi. Content components can also be used to provide a table.
- Internal – If you want to share information with instructors but not with students, you can use the internal component.

Be sure to click “Save” after choosing the component. Your new component will appear at the bottom of the syllabus template.
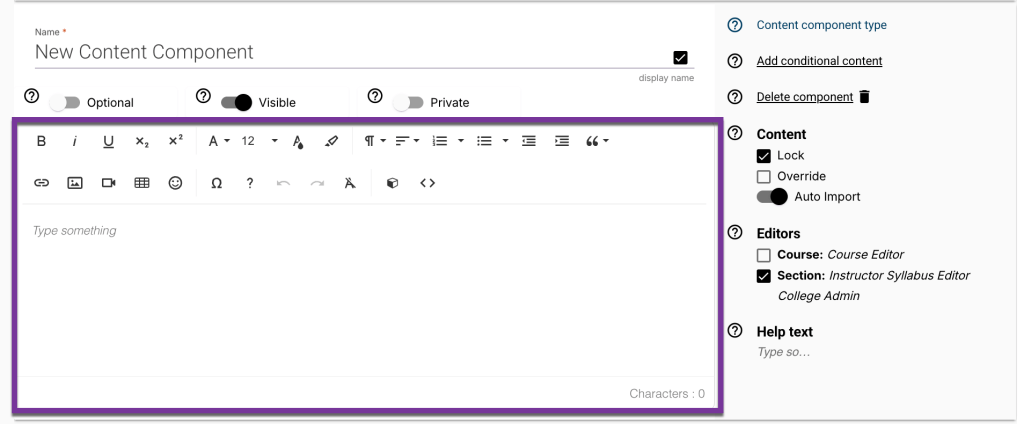
Changing Component Fields and Settings #
There are three toggles at the top of the component that you can change.
- Optional – The new component will be optional by default. Click to flip the toggle and make this element Required, if you wish.
- Visible – The component will be visible to instructors and students by default. Click to flip the toggle and make the component Invisible, which will make it visible only to instructors, not students.
- Public – By default, new components are visible to the public. If you click to toggle this one, the component will become Private, and visible only to students enrolled in the course.

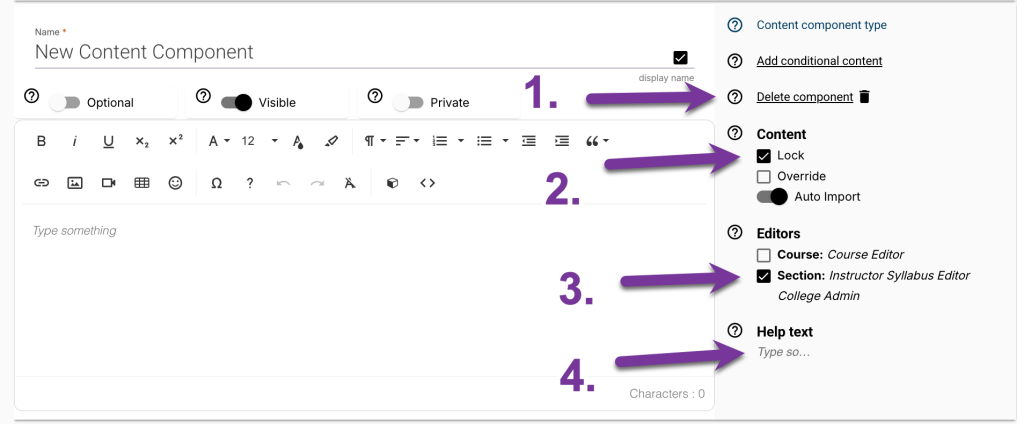
There are some settings of interest to the right of the component.
- Delete Component – If you need to delete the section, click this option. You will be asked to confirm whether you really want to delete this component before it is officially deleted.
- Lock – If you wish to prevent your instructors from editing what you put in the component, check the “Lock” box.
- Section – If you want instructors to be able to edit this component, make sure Section is checked under the Editors area.
- Help Text – You can provide your instructors with directions on how to complete the component and what information they should include.
You can also enter content directly inside the component. You can add text, links tables, images, videos, etc.
Note: At any time, you can hover over or click the question mark icon next to a setting to get a description of what the setting does.
Reorder Components #
To reorder components, click on the “Reorder” button from the left navigation bar.

A menu will pop up, showing the list of all components in the syllabus template. Click the up or down arrows to move components to where you want.
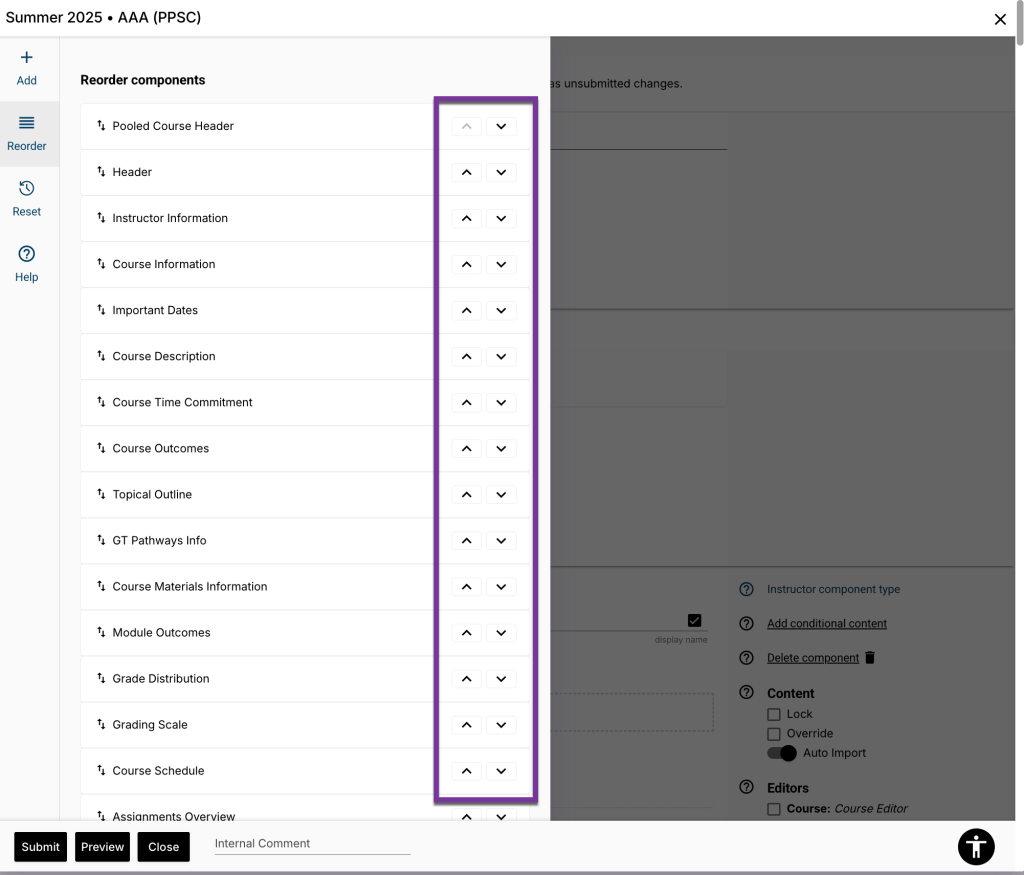
Click the close button at the bottom of the list, or click inside the grey shaded area to close this menu and return to the syllabus template.

Submitting Changes to the Syllabus Template #
When you have finished making changes to the Syllabus Template, click “Submit” at the bottom of the window.
Note: It may take up to a minute for the changes to apply– DO NOT close the screen or leave the window until you see a confetti cannon animation, signaling that all changes have been applied to all of your instructor’s syllabi.

Approving or Rejecting Instructor’s Simple Syllabi #
As a department chair, you can request Approver Access to Simple Syllabus, which means that once an instructor submits a syllabus for their class, you can go into the Simple Syllabus site and review the syllabus before it becomes available to students. Email elearning@pikespeak.edu for any questions or to request Approver Access.
If you have Approver Access for your department, follow the steps below to find the syllabi you need to review for your department.
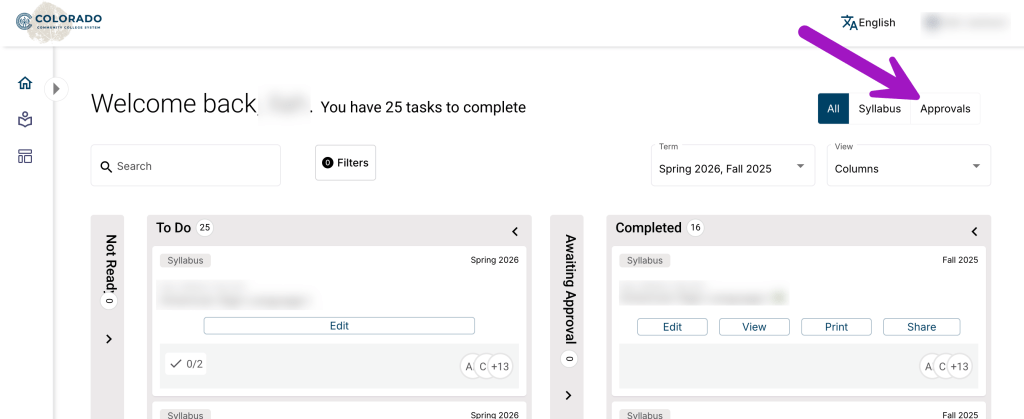
To start, log into the Simple Syllabus site. Then, click on the “Approvals” button on the right-hand side of the screen.
In the “To-Do” column, you will see all the syllabi that need to be reviewed. Click on the “Review” button on a syllabus to view it.
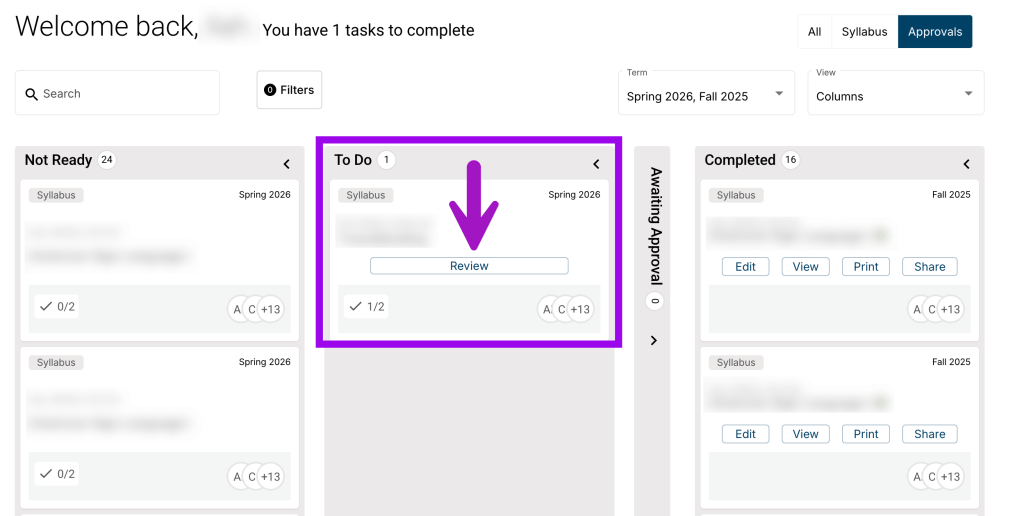
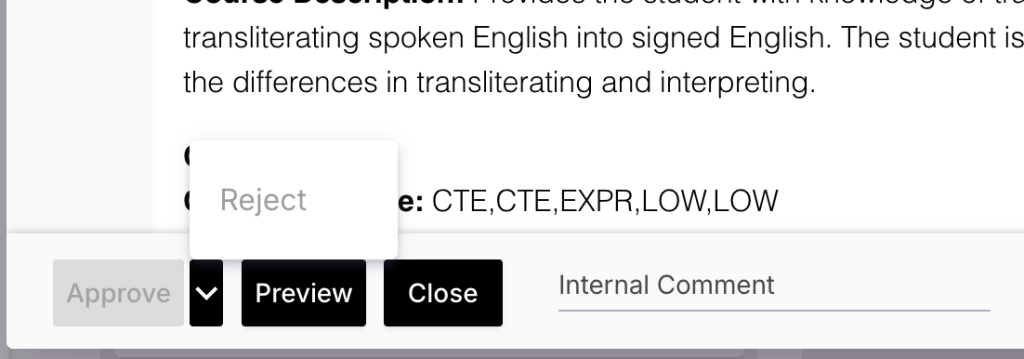
You can review and edit the syllabus as needed. At the bottom of the screen, you will have a button to “Approve” the syllabus if it is ready to show to students. If you click the down arrow next to Approve, you can select the option to “Reject.” The instructor will receive an email notification that their syllabus has been rejected.
Department Chair Simple Syllabus Training Recording #
Webinar from July 8th, 2025 (58 mins): Simple Syllabus Department Chair Training


You must be logged in to post a comment.